| Tags | care and maintenance outdoor living garden furniture guides wood burning stove guides garden inspiration home inspiration environmental issues company news show all posts |
How To Choose The Right Wood For Your Wood Burning Stove
If you have a wood burning stove or a multi fuel stove, you'll no doubt have already experienced the great benefits it can offer.
Multi fuel stoves in particular offer the opportunity to burn various fuels, which can make it much cheaper to warm your home than central heating.

A wood burning stove or multifuel stove can be a great addition to your home. But how can you choose the right wood to ensure you get the most benefit from your burner? This guide will help you decide.
But if it's wood fuel you're after, how can you choose the right wood for your burner? It's not simply a case of picking some timber and throwing it in. You must make a much more considered approach. To help you select the right wood, we've put together this guide to ease the process.
In this guide, you'll learn:
- Why you need to burn seasoned wood.
- How to season your own wood.
- The difference between hardwoods and softwoods.
- The best and worst softwoods and hardwoods for burning.
Let's take a look at how to choose the ideal wood for your stove...
Always Burn Seasoned Wood
When you burn wood in your stove, you need to ensure that it is seasoned. Confused? Let us explain...
What Is The Difference Between Unseasoned And Seasoned Wood?
Seasoned wood is simply wood that has been left to dry over a period of time since it was felled. The seasoning of softwoods usually takes between six months and a year, while hardwood seasoning can take between a year and two years. (More on hardwoods and softwoods later).
Unseasoned wood, as you may have guessed, is that which hasn't been dried out, and still contains moisture and sap within. This is also referred to as “green” wood.
Seasoned wood burns much better than unseasoned wood, and therefore it's much better to use it in your wood burner. Using unseasoned wood in a wood burner can present a number of problems. These include:
- Difficult to start and maintain the fire.
- Large amounts of smoke produced.
- Fewer flames produced than from seasoned wood.
- Low output of heat.
- Shorter burn time.
- Excess smoke given off, which can cause unpleasant smells in the home.
- Dirtier glass and bricks inside the stove.
- Faster and more dense build up of creosote in the flue pipe.
As you can see, burning green or unseasoned wood can lead to a number of issues, so it's always better to burn seasoned wood. You can usually buy the wood seasoned, although it may be cheaper to buy unseasoned wood.
If you have the space (and patience) to do so, seasoning the wood yourself can save you money.
Seasoning Your Own Wood
Freshly chopped wood contains around 50% water content, sometimes more. This makes it difficult to burn. Instead, it should be left to dry. Once the wood gets down to 20% water content, it can be burned much more effectively.
This process of drying out the wood is known as seasoning. You can usually buy wood which has already been seasoned and is ready to burn. However, if you have the space, you can season your own wood. There are a couple of key benefits to this:
You will know exactly how long the wood has been seasoned for and whether it is dry enough to burn in a stove.
Green wood is much cheaper than seasoned wood, so you will save money on your fuel.
How To Season Wood
Because the wood needs to be dried over a long period of time (sometimes up to two years), seasoning your own wood is obviously a long process. However, if you wish to save money on fuel for your wood burner, it's a great way to reduce the costs of buying ready seasoned wood.
Here's a quick guide on how to season wood.
Step 1 – Do your research
All tree and wood types have different properties, including water content. This means they will require different lengths of drying time. Research the properties of your chosen wood fuel to determine the right amount of seasoning time. Leaving it for as long as possible isn't necessarily the best policy, because over-dried wood won't burn as well.
Step 2 – Cut down to size
You may be able to get your wood already cut to size. However, if you need to chop the logs yourself, try to aim for around 16 inches (40 cm) lengths, with 6-8 inch (15-20 cm) diameters.

Step 3 – Stack the wood
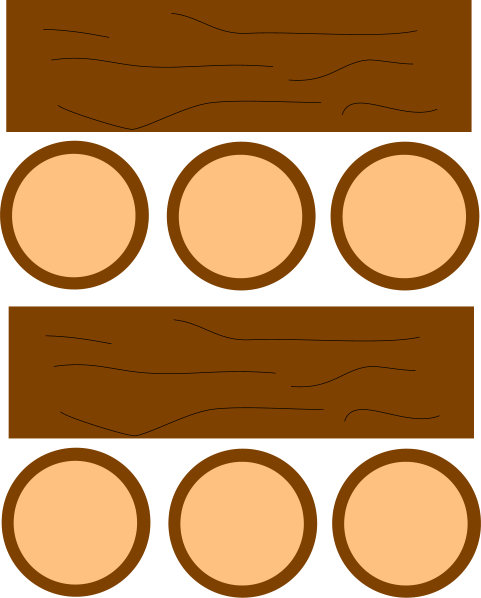
Store your wood in a woodshed or, if storing unsheltered, on an old pallet or a couple of logs to keep your stack off the ground. This allows air circulation which helps the drying process. Similarly, keep the wood away from walls to enable the movement of air. Keep the logs secure by stacking the layers at alternating 90 degree angles.

Step 4 – Cover the stack
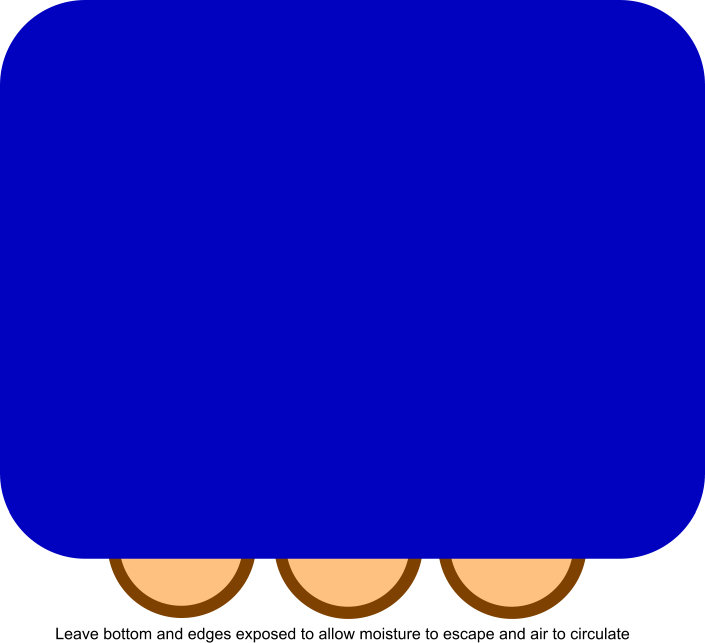
There is some argument to suggest that covering is not necessary. But in Britain, where rain is common, it might be a good idea to cover your stack with a tarpaulin if it's not covered by a canopy. If using a sheet to cover your stack of wood, remember to leave a gap at the bottom to allow moisture to escape and air to circulate.

Step 5 – Check the wood
It's always a good idea to check your wood regularly. There are several simple tests you can use to determine whether or not the wood is ready for burning:
Use a wood moisture test meter to get an accurate reading of the current water content.
Look for cracks and splits in the wood. Cracks indicate dryness.
Try to burn a log in a roaring fire. If it burns within 15 minutes, it's good to use.
Knock two logs together. If the sound is like a ringing noise, it's probably dry. A thudding sound is more likely the sound of wet wood.
Step 6 – Burn it
Once you're happy that your wood is dry enough, it's time to burn it. Simply load up your stove as directed, and enjoy the natural warmth given off.
Should You Burn Hardwoods Or Softwoods?
Earlier in this post, we briefly touched on hardwoods and softwoods. But what are these, and what impact do they have on your wood burning?
Woods can be generally divided into two broad groups; softwoods and hardwoods. Softwoods are those which come from coniferous, evergreen trees. Hardwoods, on the other hand, come from deciduous trees which lose their leaves every autumn.
So, should you burn hardwoods or softwoods in your stove? In truth, you can use either (or a mixture of both). The two types of wood possess different properties, so you may need to consider exactly how you want to use the wood burner before you make your decision between hardwood and softwood.
- Softwoods are, in most cases, cheaper to buy than hardwoods.
- In many cases, hardwoods generally provide a longer burn than softwoods, so although they are more expensive, they may actually present greater value for money in the long run.
- Softwoods can be easier to catch aflame than hardwoods. Combining the two, by using a softwood as kindling to get the fire going, can help to create an effective burn.
- Softwoods leave very little coal, so are not as effective as hardwoods for use in overnight heating.
With these properties and benefits in mind, lets take a look at the best and worst woods for use in your stove.
Best And Worst Softwoods For Burning
These are some of the best and worst softwoods for burning in your stove.
|
Best softwoods for burning |
Worst softwoods for burning |
||
|
Wood |
Reason |
Wood |
Reason |
|
Yew |
Provides a slow burn with a very good output of heat. |
Larch |
Provides a decent heat output but spits and can cause oily deposits in the flue. |
|
Birch |
Produces a good heat output, although it burns quickly. |
Spruce |
Produces a poor heat output and burns very quickly. |
|
Cedar |
Provides a good heat output and burns over a long period of time. |
Douglas Fir |
Produces a small flame and burns quickly. Also causes oily deposits in the flue. |
Best And Worst Hardwoods For Burning
These are some of the best and worst hardwoods for use in a wood burner.
|
Best hardwoods for burning |
Worst hardwoods for burning |
||
|
Wood |
Reason |
Wood |
Reason |
|
Ash |
Provides a steady flame and produces a good heat output. |
Chestnut |
Provides a small flame and poor heat output. |
|
Beech |
Similar to ash, it produces a steady flame and with a good heat output. |
Eucalyptus |
Burns very quickly, and can leave oily deposits in the flue if not well seasoned. |
|
Thorn |
Produces a steady flame with good heat output and little smoke. |
Willow |
Offers a poor burn quality, even when it has been well seasoned. |
Choosing Your Wood
Much of your decision will be down to what wood is available in your area, and your budget. It's certainly worth buying green wood and seasoning it yourself if you have the space, as it can save a lot of money over time.
Do you have any top tips for choosing wood for your burner? Let us know in the comments. And if you found this guide helpful, please share with your fellow wood burning friends!

